
JavaScript CRUD Tutorial – Step By Step Guide!
Previously, we learned how to create, read, update, delete, search, and paginate data with our simple REST API tutorial in PHP.
Today, this tutorial will demonstrate a step-by-step approach to creating a CRUD (Create, Read, Update, Delete) application using JavaScript.
We will utilize a pre-existing REST API as the back-end and create a user-friendly front-end interface to interact with the data. This guide is perfect for developers learning to create dynamic web applications using JavaScript.
We will also incorporate search and pagination functionality to enhance the user experience. By the end of this tutorial, you will have a solid understanding of how to create a fully-functional CRUD application using JavaScript and a REST API. Let's get started!
Overview
What Is JavaScript? JavaScript is a programming language used to make websites interactive and dynamic. It is used on the client side, meaning it runs on the user's device (such as a computer or phone) rather than on a server.
It is used on 98% of websites and is often used in conjunction with HTML and CSS to create a complete web experience. With JavaScript, you can update content, control multimedia, and create animations.
But this tutorial will focus on creating, reading, updating, and deleting database records. We will do it using JavaScript, JSON, and PHP. JSON data will be handled by the REST API built using PHP.
I highly recommend studying the previous tutorials first before proceeding here. But if you think you can take this one, then go on.
Program Output
Below are the screenshots of our tutorial's final result. You can click an image to view the larger version of it.


Let’s proceed to the step-by-step tutorial.
Set Up The REST API
In this tutorial, we will use a REST API built with PHP.
We did not include REST API source code because we were hoping you could focus on learning to code with JavaScript, not PHP.
But the good news is we made a separate tutorial about how to build a simple REST API with PHP. Click here to learn the step-by-step PHP REST API tutorial.
I highly recommend learning our REST API tutorial first. This is because we will use that API for the rest of this tutorial.
But if you already have your REST API that will work with this tutorial, that's also okay.
In my case, one example where I can access the REST API is: http://localhost/api/product/read.php
That link will show me the list of products from the database, in JSON format. It looks like the following screenshot.

Our JavaScript app will consume the data above. The list of products will be displayed in the Bootstrap table with buttons like "Read One," "Update," and "Delete." This tutorial will show it in the "How To Read JSON Data Using JavaScript?" section.
By the way, I'm using a Chrome extension called JSONView to make the JSON data readable in the browser.
Create index.html file
Create index.html file on your project's main folder. Open that file and put in the following code.
<!DOCTYPE html>
<html lang="en">
<head>
    <meta charset="utf-8">
    <meta http-equiv="X-UA-Compatible" content="IE=edge">
    <meta name="viewport" content="width=device-width, initial-scale=1">
    <title>Read Products</title>
    <!-- bootstrap CSS -->
	<link href="https://maxcdn.bootstrapcdn.com/bootstrap/3.3.7/css/bootstrap.min.css" rel="stylesheet" integrity="sha384-BVYiiSIFeK1dGmJRAkycuHAHRg32OmUcww7on3RYdg4Va+PmSTsz/K68vbdEjh4u" crossorigin="anonymous">
	<!-- custom CSS -->
	<link href="app/assets/css/style.css" rel="stylesheet" />
</head>
<body>
<!-- our app will be injected here -->
<div id="app"></div>
<!-- jQuery library -->
<script src="https://code.jquery.com/jquery-3.6.0.min.js"
        integrity="sha256-/xUj+3OJU5yExlq6GSYGSHk7tPXikynS7ogEvDej/m4=" crossorigin="anonymous"></script>
<!-- bootstrap JavaScript -->
<script src="https://maxcdn.bootstrapcdn.com/bootstrap/3.3.7/js/bootstrap.min.js"
        integrity="sha384-Tc5IQib027qvyjSMfHjOMaLkfuWVxZxUPnCJA7l2mCWNIpG9mGCD8wGNIcPD7Txa" crossorigin="anonymous">
    </script>
<!-- bootbox for confirm pop up -->
<script src="https://cdnjs.cloudflare.com/ajax/libs/bootbox.js/4.4.0/bootbox.min.js"></script>
<!-- app js script -->
<script src="app/app.js"></script>
<!-- products scripts -->
<script src="app/products/read-products.js"></script>
<script src="app/products/create-product.js"></script>
<script src="app/products/read-one-product.js"></script>
<script src="app/products/update-product.js"></script>
<script src="app/products/delete-product.js"></script>
</body>
</html>
Create custom CSS file
- Create "
app" folder. - Open the "
app" folder and create the "assets" folder. - Open the "
assets" folder and create the "css" folder. - Open the "
css" folder and create "style.css" file.
The "style.css" file is our custom CSS file. You can put any CSS in this file for additional web page styling. In our case, we have the following CSS code inside the "style.css" file.
.m-r-10px{ margin-right:10px; }
.m-b-10px{ margin-bottom:10px; }
.m-b-15px{ margin-bottom:15px; }
.m-b-20px{ margin-bottom:20px; }
.w-5-pct{ width:5%; }
.w-10-pct{ width:10%; }
.w-15-pct{ width:15%; }
.w-20-pct{ width:20%; }
.w-25-pct{ width:25%; }
.w-30-pct{ width:30%; }
.w-35-pct{ width:35%; }
.w-40-pct{ width:40%; }
.w-45-pct{ width:45%; }
.w-50-pct{ width:50%; }
.w-55-pct{ width:55%; }
.w-60-pct{ width:60%; }
.w-65-pct{ width:65%; }
.w-70-pct{ width:70%; }
.w-75-pct{ width:75%; }
.w-80-pct{ width:80%; }
.w-85-pct{ width:85%; }
.w-90-pct{ width:90%; }
.w-95-pct{ width:95%; }
.w-100-pct{ width:100%; }
.display-none{ display:none; }
.padding-bottom-2em{ padding-bottom:2em; }
.width-30-pct{ width:30%; }
.width-40-pct{ width:40%; }
.overflow-hidden{ overflow:hidden; }
.margin-right-1em{ margin-right:1em; }
.right-margin{ margin:0 .5em 0 0; }
.margin-bottom-1em { margin-bottom:1em; }
.margin-zero{ margin:0; }
.text-align-center{ text-align:center; }
Use jQuery, Bootstrap, and Bootbox.js libraries
As you can see in the index.html file, we use jQuery and Bootbox.js libraries.
jQuery JavaScript library is needed to make it easy to control interactions like button clicking and form submission. In this tutorial, we are using jQuery version 3.6.0. jQuery CDN is here.
Bootstrap makes it easy for us to have a beautiful user interface. We are using Bootstrap version 3.3.7 in this tutorial. Bootstrap CDN is here.
Bootbox.js library is needed to make the "delete" confirmation dialog box look better. We are using Bootbox.js version 4.4.0 in this tutorial. Bootbox.js CDN is here.
Create app.js file
The "app.js" file contains some basic HTML and JavaScript functions that other JS files in our app can use.
- Open "
app" folder. - Inside that "
app" folder, create "app.js" file. - Open "
app.js" file and put the following code.
$(document).ready(function(){
    // app html
    var app_html=`
        <div class='container'>
            <div class='page-header'>
                <h1 id='page-title'>Read Products</h1>
            </div>
            <!-- this is where the contents will be shown. -->
            <div id='page-content'></div>
        </div>`;
    // inject to 'app' in index.html
    $("#app").html(app_html);
});
// change page title
function changePageTitle(page_title){
	// change page title
	$('#page-title').text(page_title);
	// change title tag
	document.title=page_title;
}
// function to make form values to json format
$.fn.serializeObject = function()
{
    var o = {};
    var a = this.serializeArray();
    $.each(a, function() {
        if (o[this.name] !== undefined) {
            if (!o[this.name].push) {
                o[this.name] = [o[this.name]];
            }
            o[this.name].push(this.value || '');
        } else {
            o[this.name] = this.value || '';
        }
    });
    return o;
};
Create “products” scripts
Now, we will create several JavaScript files.
- Open "
app" folder. - Create "
products" folder inside "app" folder. - Create the following files inside "
products" folder:read-products.jscreate-product.jsread-one-product.jsupdate-product.jsdelete-product.js
What's the code inside the JavaScript files above? For now, we will leave them empty. But we will fill them out in the next several sections of this tutorial.
Output
Our code so far will have almost empty output. It should look like the following.

How To Read JSON Data Using JavaScript?
Show products on first page load
- Open "
app" folder. - Open "
products" folder inside the "app" folder. - Open
read-products.jsfile inside the "products" folder.
The following code will call the showProducts() method on first load of the web page.
The showProducts() will show the list of products in an HTML table. Put the following code inside read-products.js file.
$(document).ready(function(){
    // show list of product on first load
    showProducts();
});
// showProducts() method will be here
Show products on click of a button
The following code will call showProducts() method in a click of a button with read-products-button class.
The button can be found in the "create product" and "update product" HTML template. We will see it in the next sections.
Put the following code under the showProducts(); of the previous section.
// when a 'read products' button was clicked
$(document).on('click', '.read-products-button', function(){
	showProducts();
});
Create showProducts() function
Now we will create the showProducts() method. Replace // showProducts() method will be here comment in read-products.js file with the following code.
// function to show list of products
function showProducts(){
}
Get list of products
The following code will contact our API to get the list of products in JSON format. Put the following code after the opening curly brace of the previous section.
// get list of products from the API
$.getJSON("http://localhost/api/product/read.php", function(data){
});
Add “Create Product” button
We have to add a "Create Product" button in the "products list" view. We will make this button work later in this tutorial.
Place the following code after the opening curly brace of the previous section.
// html for listing products
var read_products_html=`
    <!-- when clicked, it will load the create product form -->
    <div id='create-product' class='btn btn-primary pull-right m-b-15px create-product-button'>
        <span class='glyphicon glyphicon-plus'></span> Create Product
    </div>
Build HTML table
We have to start building the HTML table where the list of products will appear.
The following code will build an HTML table with its heading. Place it after the previous section's code.
<!-- start table -->
<table class='table table-bordered table-hover'>
    <!-- creating our table heading -->
    <tr>
        <th class='w-25-pct'>Name</th>
        <th class='w-10-pct'>Price</th>
        <th class='w-15-pct'>Category</th>
        <th class='w-25-pct text-align-center'>Action</th>
    </tr>`;
	// rows will be here
// end table
read_products_html+=`</table>`;
Build table row per record
We will loop through each record returned by the API. In each record, we will create a table row.
Aside from product data, the table row will have the "action" buttons as well. These include the "Read One", "Edit" and "Delete" buttons.
Replace "// rows will be here" comment of the previous section with the following code.
// loop through returned list of data
$.each(data.records, function(key, val) {
    // creating new table row per record
    read_products_html+=`
        <tr>
            <td>` + val.name + `</td>
            <td>$` + val.price + `</td>
            <td>` + val.category_name + `</td>
            <!-- 'action' buttons -->
            <td>
                <!-- read product button -->
                <button class='btn btn-primary m-r-10px read-one-product-button' data-id='` + val.id + `'>
                    <span class='glyphicon glyphicon-eye-open'></span> Read
                </button>
                <!-- edit button -->
                <button class='btn btn-info m-r-10px update-product-button' data-id='` + val.id + `'>
                    <span class='glyphicon glyphicon-edit'></span> Edit
                </button>
                <!-- delete button -->
                <button class='btn btn-danger delete-product-button' data-id='` + val.id + `'>
                    <span class='glyphicon glyphicon-remove'></span> Delete
                </button>
            </td>
        </tr>`;
});
Inject to page content
We have to make the HTML table appear on our webpage. We will do this by injecting the table into the "page-content" div.
Place the following code after the closing "table" tag
// inject to 'page-content' of our app
$("#page-content").html(read_products_html);
5.9 Change page title
The following code will change the "title" seen on the web page and the "title" seen on the browser tab.
Place the following code after the previous section's code.
// chage page title
changePageTitle("Read Products");
Output
After doing all the steps above, the output should look like the following.

How To Create or Insert Data Using JavaScript?
Handle “Create Product” Button Click
- Open "
app" folder. - Open "
products" folder inside the "app" folder. - Open
create-product.jsfile inside the "products" folder.
The following code will handle a click of a button. This button should have "create-product-button" class.
Place the following code inside create-product.js file.
$(document).ready(function(){
    // show html form when 'create product' button was clicked
    $(document).on('click', '.create-product-button', function(){
		// categories api call will be here
    });
	// 'create product form' handle will be here
});
Get list of categories from API
We need to get list of categories from the API because we will build the "categories" select field. This is where the user can select the category of the product.
Replace "// categories api call will be here" of the previous section with the following code.
// load list of categories
$.getJSON("http://localhost/api/category/read.php", function(data){
});
Build “categories option” select field
This is where we build the HTML "select" field with the "categories" option.
Place the following code after the opening curly brace of the previous section.
// build categories option html
// loop through returned list of data
var categories_options_html=`<select name='category_id' class='form-control'>`;
$.each(data.records, function(key, val){
    categories_options_html+=`<option value='` + val.id + `'>` + val.name + `</option>`;
});
categories_options_html+=`</select>`;
Add “Read Products” button
The "read products" button is needed so that we can go back to the products list.
Place the following code after the previous section's code.
// we have our html form here where product information will be entered
// we used the 'required' html5 property to prevent empty fields
var create_product_html=`
    <!-- 'read products' button to show list of products -->
    <div id='read-products' class='btn btn-primary pull-right m-b-15px read-products-button'>
        <span class='glyphicon glyphicon-list'></span> Read Products
    </div>
Build “Create Product” HTML Form
Now we will build the actual "creat product" HTML form. This is where the user can enter the new product information that will be sent to the server.
Place the following code after the previous section's code.
<!-- 'create product' html form -->
<form id='create-product-form' action='#' method='post' border='0'>
    <table class='table table-hover table-responsive table-bordered'>
        <!-- name field -->
        <tr>
            <td>Name</td>
            <td><input type='text' name='name' class='form-control' required /></td>
        </tr>
        <!-- price field -->
        <tr>
            <td>Price</td>
            <td><input type='number' min='1' name='price' class='form-control' required /></td>
        </tr>
        <!-- description field -->
        <tr>
            <td>Description</td>
            <td><textarea name='description' class='form-control' required></textarea></td>
        </tr>
        <!-- categories 'select' field -->
        <tr>
            <td>Category</td>
            <td>` + categories_options_html + `</td>
        </tr>
        <!-- button to submit form -->
        <tr>
            <td></td>
            <td>
                <button type='submit' class='btn btn-primary'>
                    <span class='glyphicon glyphicon-plus'></span> Create Product
                </button>
            </td>
        </tr>
    </table>
</form>`;
Show “Create Product” form and change page title
We have to make the HTML button and form appear on our web page. We will change the page title as well.
Place the following code after the previous section's code.
// inject html to 'page-content' of our app
$("#page-content").html(create_product_html);
// chage page title
changePageTitle("Create Product");
Handle “create product” form submit
If the "create product" form is submitted, we need a script to handle it.
Find "// 'create product form' handle will be here" and replace it with the following code.
// will run if create product form was submitted
$(document).on('submit', '#create-product-form', function(){
	// form data will be here
});
Get form data
This is how we get data entered in our "create product" HTML form.
Replace "// form data will be here" of the previous section with the following code.
// get form data
var form_data=JSON.stringify($(this).serializeObject());
Now we will send the data to the server.
Place the following code after the previous section's code.
// submit form data to api
$.ajax({
	url: "http://localhost/api/product/create.php",
	type : "POST",
	contentType : 'application/json',
	data : form_data,
	success : function(result) {
		// product was created, go back to products list
		showProducts();
	},
	error: function(xhr, resp, text) {
		// show error to console
		console.log(xhr, resp, text);
	}
});
return false;
Output
The output should look like the following.

How To Read One Data Using JavaScript?
Handle “read one” button click
The "read one" button is seen on the "product list" view. When click, it should show the complete product details.
- Open "
app" folder. - Inside the "
app" folder, open "products" folder. - Inside the "
products" folder, open "read-one-product.js" file.
Place the following code inside "read-one-product.js" file.
$(document).ready(function(){
    // handle 'read one' button click
    $(document).on('click', '.read-one-product-button', function(){
		// product ID will be here
    });
});
Get product ID
Our script need to identify the record to be read. We do it by getting the product ID.
Replace "// product ID will be here" of the previous section with the following code.
// get product id
var id = $(this).attr('data-id');
Read one record from API
We will send the product ID to the API. It will return the data based on the given ID.
Place the following code after the previous section's code.
// read product record based on given ID
$.getJSON("http://localhost/api/product/read_one.php?id=" + id, function(data){
	// read products button will be here
});
Add “read products” button
We need the "read products" button so we can go back to the products list.
Replace "// read products button will be here" of the previous section with the following code.
// start html
var read_one_product_html=`
    <!-- when clicked, it will show the product's list -->
    <div id='read-products' class='btn btn-primary pull-right m-b-15px read-products-button'>
        <span class='glyphicon glyphicon-list'></span> Read Products
    </div>
Show record data in HTML table
We will place the product information returned by the API to an HTML table.
Place the following code after the previous section's code.
<!-- product data will be shown in this table -->
<table class='table table-bordered table-hover'>
    <!-- product name -->
    <tr>
        <td class='w-30-pct'>Name</td>
        <td class='w-70-pct'>` + data.name + `</td>
    </tr>
    <!-- product price -->
    <tr>
        <td>Price</td>
        <td>` + data.price + `</td>
    </tr>
    <!-- product description -->
    <tr>
        <td>Description</td>
        <td>` + data.description + `</td>
    </tr>
    <!-- product category name -->
    <tr>
        <td>Category</td>
        <td>` + data.category_name + `</td>
    </tr>
</table>`;
Show “Read One Product” HTML table and change page title
We have to make the HTML button and table appear on our web page. We will change the page title as well.
Place the following code after the previous section's code.
// inject html to 'page-content' of our app
$("#page-content").html(read_one_product_html);
// chage page title
changePageTitle("Create Product");
Output
The output should look like the following.

How To Update Data Using JavaScript?
Handle “udpate product” button click
The "edit" button is seen on the "product list" view. When click, it should show the "update product" form filled out with product information.
- Open "
app" folder. - Inside the "
app" folder, open "products" folder. - Inside the "
products" folder, open "update-product.js" file.
Place the following code inside "update-product.js" file.
$(document).ready(function(){
    // show html form when 'update product' button was clicked
    $(document).on('click', '.update-product-button', function(){
		// product ID will be here
    });
	// 'update product form' submit handle will be here
});
8.2 Get product ID
Our script need to identify the record to be read. We do it by getting the product ID.
Replace "// product ID will be here" of the previous section with the following code.
// get product id
var id = $(this).attr('data-id');
Read product information
To fill out our "update product" HTML form, we need to get product information from the API.
Place the following code after the previous section's code.
// read one record based on given product id
$.getJSON("http://localhost/api/product/read_one.php?id=" + id, function(data){
	// values will be used to fill out our form
	var name = data.name;
	var price = data.price;
	var description = data.description;
	var category_id = data.category_id;
	var category_name = data.category_name;
	// load list of categories will be here
});
Get list of categories
A list of categories is needed for product category options. Category records will be rendered as options in a "select" HTML input field.
Replace "// load list of categories will be here" of the previous section with the following code.
// load list of categories
$.getJSON("http://localhost/api/category/read.php", function(data){
	// build 'categories option' html
	// loop through returned list of data
        var categories_options_html=`<select name='category_id' class='form-control'>`;
        $.each(data.records, function(key, val){
            // pre-select option is category id is the same
            if(val.id==category_id){ categories_options_html+=`<option value='` + val.id + `' selected>` + val.name + `</option>`; }
            else{ categories_options_html+=`<option value='` + val.id + `'>` + val.name + `</option>`; }
        });
        categories_options_html+=`</select>`;
	// update product html will be here
});
Add “Read Products” button
The "read products" button is needed so that we can go back to the products list.
Replace "// update product html will be here" of the previous section with the following code.
// store 'update product' html to this variable
var update_product_html=`
    <div id='read-products' class='btn btn-primary pull-right m-b-15px read-products-button'>
        <span class='glyphicon glyphicon-list'></span> Read Products
    </div>
Build “Update Product” form
Now we will build the "update product" HTML form. This form will be built with an HTML table and the input fields are filled out with product information.
Place the following code after the previous section's code.
<!-- build 'update product' html form -->
<!-- we used the 'required' html5 property to prevent empty fields -->
<form id='update-product-form' action='#' method='post' border='0'>
    <table class='table table-hover table-responsive table-bordered'>
        <!-- name field -->
        <tr>
            <td>Name</td>
            <td><input value=\"` + name + `\" type='text' name='name' class='form-control' required /></td>
        </tr>
        <!-- price field -->
        <tr>
            <td>Price</td>
            <td><input value=\"` + price + `\" type='number' min='1' name='price' class='form-control' required /></td>
        </tr>
        <!-- description field -->
        <tr>
            <td>Description</td>
            <td><textarea name='description' class='form-control' required>` + description + `</textarea></td>
        </tr>
        <!-- categories 'select' field -->
        <tr>
            <td>Category</td>
            <td>` + categories_options_html + `</td>
        </tr>
        <tr>
            <!-- hidden 'product id' to identify which record to delete -->
            <td><input value=\"` + id + `\" name='id' type='hidden' /></td>
            <!-- button to submit form -->
            <td>
                <button type='submit' class='btn btn-info'>
                    <span class='glyphicon glyphicon-edit'></span> Update Product
                </button>
            </td>
        </tr>
    </table>
</form>`;
Show “Update Product” form and change page title
We need to show our "update product" HTML on our webpage. We will change the page title as well.
Put the following code after the previous section's code.
// inject to 'page-content' of our app
$("#page-content").html(update_product_html);
// chage page title
changePageTitle("Update Product");
Handle “udpate product” form submission
If the "update product" form is submitted, we need a script to handle it.
Find "// 'update product form' submit handle will be here" and replace it with the following code.
// will run if 'create product' form was submitted
$(document).on('submit', '#update-product-form', function(){
	// get form data will be here
	return false;
});
Get form data
We will get the product information from our "update product" HTML form.
Replace "// get form data will be here" of the previous section with the following code.
// get form data
var form_data=JSON.stringify($(this).serializeObject());
Send form data to server
After getting the form data, we will send the data to our API.
Place the following code after the previous section's code.
// submit form data to api
$.ajax({
	url: "http://localhost/api/product/update.php",
	type : "POST",
	contentType : 'application/json',
	data : form_data,
	success : function(result) {
		// product was created, go back to products list
		showProducts();
	},
	error: function(xhr, resp, text) {
		// show error to console
		console.log(xhr, resp, text);
	}
});
Output
The output should look like the following.

How To Delete Data Using JavaScript?
Handle “Delete Product” button click
The "delete product" button is seen in the "read products" view. When it was clicked, we need to handle it.
- Open "
app" folder. - Inside the "
app" folder, open "products" folder. - Inside the "
products" folder, open "delete-product.js" file.
Place the following code inside "delete-product.js" file.
$(document).ready(function(){
    // will run if the delete button was clicked
    $(document).on('click', '.delete-product-button', function(){
		// product id will be here
	});
});
Get product ID
The product ID is needed to identify which record to delete using the API.
Replace "// product id will be here" of the previous section with the following code.
// get the product id
var product_id = $(this).attr('data-id');
Show “delete confirmation” dialog box
This is where we will use the Bootbox.js library. We will show a dialog box with "Are you sure?" message with "Yes" and "No" buttons.
Place the following code after the previous section's code.
// bootbox for good looking 'confirm pop up'
bootbox.confirm({
	message: "<h4>Are you sure?</h4>",
	buttons: {
		confirm: {
			label: '<span class="glyphicon glyphicon-ok"></span> Yes',
			className: 'btn-danger'
		},
		cancel: {
			label: '<span class="glyphicon glyphicon-remove"></span> No',
			className: 'btn-primary'
		}
	},
	callback: function (result) {
		// delete request will be here
	}
});
Delete record using API
If the user clicked "Yes" on the dialog box, a "delete" request will be sent to the API.
Replace "// delete request will be here" of the previous section with the following code.
if(result==true){
	// send delete request to api / remote server
	$.ajax({
		url: "http://localhost/api/product/delete.php",
		type : "POST",
		dataType : 'json',
		data : JSON.stringify({ id: product_id }),
		success : function(result) {
			// re-load list of products
			showProducts();
		},
		error: function(xhr, resp, text) {
			console.log(xhr, resp, text);
		}
	});
}
Output

How To Search Data Using JavaScript?
This feature is part of our LEVEL 2 source code.
Include two JS file in index.html
<!-- products scripts -->
<script src="app/products/products.js"></script>
<script src="app/products/search-product.js"></script>
Create products.js file
The "products.js" file will contain any functions that can be used by other product components like our "read-products.js" or "search-products.js" files.
Open "app" folder. Open "products" folder. Create "products.js" file.
Open the "products.js" file and put the following code.
// product list html
function readProductsTemplate(data, keywords){
    var read_products_html=`
		<!-- search products form -->
		<form id='search-product-form' action='#' method='post'>
		<div class='input-group pull-left w-30-pct'>
			<input type='text' value='` + keywords + `' name='keywords' class='form-control product-search-keywords' placeholder='Search products...' />
			<span class='input-group-btn'>
				<button type='submit' class='btn btn-default' type='button'>
					<span class='glyphicon glyphicon-search'></span>
				</button>
			</span>
		</div>
		</form>
		<!-- when clicked, it will load the create product form -->
		<div id='create-product' class='btn btn-primary pull-right m-b-15px create-product-button'>
			<span class='glyphicon glyphicon-plus'></span> Create Product
		</div>
		<!-- start table -->
		<table class='table table-bordered table-hover'>
			<!-- creating our table heading -->
			<tr>
				<th class='w-25-pct'>Name</th>
				<th class='w-10-pct'>Price</th>
				<th class='w-15-pct'>Category</th>
				<th class='w-25-pct text-align-center'>Action</th>
			</tr>`;
    // loop through returned list of data
    $.each(data.records, function(key, val) {
        // creating new table row per record
        read_products_html+=`<tr>
            <td>` + val.name + `</td>
            <td>$` + val.price + `</td>
            <td>` + val.category_name + `</td>
            <!-- 'action' buttons -->
            <td>
                <!-- read product button -->
                <button class='btn btn-primary m-r-10px read-one-product-button' data-id='` + val.id + `'>
                    <span class='glyphicon glyphicon-eye-open'></span> Read
                </button>
                <!-- edit button -->
                <button class='btn btn-info m-r-10px update-product-button' data-id='` + val.id + `'>
                    <span class='glyphicon glyphicon-edit'></span> Edit
                </button>
                <!-- delete button -->
                <button class='btn btn-danger delete-product-button' data-id='` + val.id + `'>
                    <span class='glyphicon glyphicon-remove'></span> Delete
                </button>
            </td>
        </tr>`;
    });
    // end table
    read_products_html+=`</table>`;
    // inject to 'page-content' of our app
    $("#page-content").html(read_products_html);
}
Create search-product.js file
The "search-product.js" file will contain a code that catches the submission of the "search product" form.
Open "app" folder. Open the "products" folder. Create "search-products.js" file.
Open the "search-products.js" file and put the following code.
$(document).ready(function(){
    // when a 'search products' button was clicked
    $(document).on('submit', '#search-product-form', function(){
        // get search keywords
        var keywords = $(this).find(":input[name='keywords']").val();
        // get data from the api based on search keywords
        $.getJSON("http://localhost/api/product/search.php?s=" + keywords, function(data){
            // template in products.js
            readProductsTemplate(data, keywords);
            // chage page title
            changePageTitle("Search products: " + keywords);
        });
        // prevent whole page reload
        return false;
    });
});
Change read-products.js
We want the "product list" and "search product" to have the same HTML table template. To do this, we will use the readProductsTemplate() function of the products.js file.
Open "app" folder. Open "products" folder. Open the "read-products.js' file. Change the showProducts() function to the following code.
// function to show list of products
function showProducts(){
    // get list of products from the API
    $.getJSON("http://localhost/api/product/read.php", function(data){
        // html for listing products
        readProductsTemplate(data, "");
        // chage page title
        changePageTitle("Read Products");
    });
}
Output

How To Paginate Data Using JavaScript?
This feature is part of our LEVEL 2 and LEVEL 3 source codes.
Change JSON URL
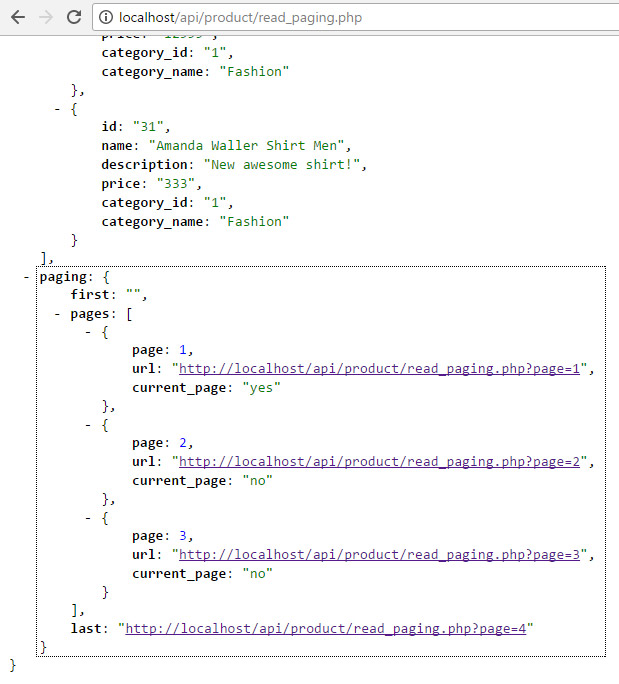
To make pagination work, we'll have to change the JSON URL. The contents of this new JSON data will include the "paging" node. It looks like the following.
So we will change the JSON URL from:
http://localhost/api/product/read.php
to
http://localhost/api/product/read_paging.php
It means we have to change something in our code. See the change in the next section.
Show products using JSON URL
Open /app/products/read-products.js file. Replace the code with the following.
$(document).ready(function(){
    // show list of product on first load
    showProductsFirstPage();
    // when a 'read products' button was clicked
    $(document).on('click', '.read-products-button', function(){
        showProductsFirstPage();
    });
    // when a 'page' button was clicked
    $(document).on('click', '.pagination li', function(){
        // get json url
        var json_url=$(this).find('a').attr('data-page');
        // show list of products
        showProducts(json_url);
    });
});
function showProductsFirstPage(){
    var json_url="http://localhost/api/product/read_paging.php";
    showProducts(json_url);
}
// function to show list of products
function showProducts(json_url){
    // get list of products from the API
    $.getJSON(json_url, function(data){
        // html for listing products
        readProductsTemplate(data, "");
        // chage page title
        changePageTitle("Read Products");
    });
}
Add Pagination HTML
Open /app/products/products.js file. Find the ending "table" tag and put the following code under it.
// pagination
if(data.paging){
    read_products_html+="<ul class='pagination pull-left margin-zero padding-bottom-2em'>";
        // first page
        if(data.paging.first!=""){
            read_products_html+="<li><a data-page='" + data.paging.first + "'>First Page</a></li>";
        }
        // loop through pages
        $.each(data.paging.pages, function(key, val){
            var active_page=val.current_page=="yes" ? "class='active'" : "";
            read_products_html+="<li " + active_page + "><a data-page='" + val.url + "'>" + val.page + "</a></li>";
        });
        // last page
        if(data.paging.last!=""){
            read_products_html+="<li><a data-page='" + data.paging.last + "'>Last Page</a></li>";
        }
    read_products_html+="</ul>";
}
Output
After making the changes above, run index.html again. Do a hard refresh. You should see the paging buttons like the one below.
Download source codes
Choose your download
| FEATURES | BASIC | PRO |
|---|---|---|
| Create product | ✔ | ✔ |
| Read product | ✔ | ✔ |
| Read one product | ✔ | ✔ |
| Update product | ✔ | ✔ |
| Delete product | ✔ | ✔ |
| Bootstrap UI | ✔ | ✔ |
| Search products | - | ✔ |
| Pagination of products & search products | - | ✔ |
| Create category | - | ✔ |
| Read category | - | ✔ |
| Read one category | - | ✔ |
| Update category | - | ✔ |
| Delete category | - | ✔ |
| Search categories | - | ✔ |
| Pagination of categories & search categories | - | ✔ |
| Navigation bar | - | ✔ |
| Inline editing of products & categories | - | ✔ |
| Export CSV of products & categories | - | ✔ |
| Bootstrap tooltip on some products & categories buttons | - | ✔ |
| Use the buttons below to download. ↓ | BASIC | PRO |
How To Run The Source Code?
We recommend that you first follow and study our well-detailed, step-by-step tutorial above. Nothing beats experience when it comes to learning.
But we believe you will learn faster if you also see the final source code. We consider it your additional guide.
Imagine the value or skill upgrade it can bring you. You can get additional income from your work, projects, or business. The precious time you save. Isn't that what you want?
By now, you need to download our source codes. To do it, use any download buttons in the next few sections below.
Once you have downloaded the source codes, here's how you can run it.
- Extract the files to your server directory.
- Set up the "api" by following the README.txt inside the "api" folder.
- Open your browser and run index.html
- If you can see the list of "product" records, it means your set up is correct.
Why download?
Do you need more reasons to download it?
| MORE REASONS TO DOWNLOAD THE CODE | ALL |
| Use new skills for your multiple projects | YES |
| Save huge amount of time learning jQuery AJAX | YES |
| Code examples are direct to the point | YES |
| Well explained and commented source code | YES |
| Fast and friendly email support | YES |
| Free source code updates | YES |
What’s Next?
Next, we will learn about authenticating users with REST API. Go to our REST API Authentication Example in PHP.
What students say?
Don't just take our word for it. See what our students have to say about our tutorials and source codes. We are proud to have helped many individuals and businesses to build their own applications. Here are a few of the testimonials from our satisfied students.
★★★★★ “Wow, I love you guys! The best web programming tutorial I’ve ever seen. So comprehensive, yet easy to follow. I love how you combine all necessary elements in such a neat structure.” ~ Olaug Nessa
★★★★★ “The fact that you’ve put it all together saves so much time and its worth buying the code. Makes me feel good supporting a developer like yourself. Keep up the good work!” ~ Dan Hudson
★★★★★ “Thanks for making these awesome tutorials! I bought your source codes. To be honest, it’s very readable code and helps me understand a lot of things and how it’s done in PHP. Thanks for that again.” ~ Michael Lammens
★★★★★ “Hey Mike, my name is Leonardo from Argentina. I’ve been reading your blog since like 4 months from now, and I really must say: your tutorials are very good, they has helped me in many of my works… Well, thank you very much man. I really admire your work.” ~ Leonardo
★★★★★ “Words can’t express how grateful I am for the work and the articles you post, had some troubles with doing somethings but your articles as per usual hit the hammer right on the head. They are a great way for expanding upon later too!” ~ Jeremy Smith
Got comments?
At codeofaninja.com, we strive to provide our readers with accurate and helpful JavaScript CRUD Tutorial – Step By Step Guide! Your feedback is essential in helping us achieve this goal.
If you have encountered any issues with the code, have suggestions for improvement, or wish to provide praise, we welcome you to leave a comment below. Please be as descriptive as possible to address your concerns effectively and include any relevant error messages, screenshots, or test URLs.
We request that comments remain on-topic and relevant to the article above. If your question or comment pertains to a different topic, we recommend seeking assistance elsewhere.
Furthermore, we ask that you review our code of conduct before commenting to ensure that your feedback is constructive and respectful.
Thank you for taking the time to provide feedback and for supporting codeofaninja.com. Your contributions help us improve our tutorials and serve the developer community better.
Subscribe for FREE!
Improve your web development skills and stay ahead of the competition by subscribing to our tutorial series. Sign up for FREE and access exclusive, cutting-edge content delivered straight to your inbox.
Take advantage of the chance to elevate your skills and advance your web development career. Subscribe now.
Thank You!
We hope you've found our JavaScript CRUD Tutorial – Step By Step Guide! helpful and informative. We understand that learning new programming concepts can be challenging, but we're glad we could make it easier for you.
Thank you for choosing to learn with us and for supporting codeofaninja.com! Consider sharing this tutorial with your friends and colleagues who may also be interested in learning about JavaScript CRUD Tutorial – Step By Step Guide!
The more people know about our tutorials, the more we can help the developer community grow. Keep learning, keep coding, and keep growing as a developer. We can't wait to see what you'll create next!

Hi! I'm Mike Dalisay, the co-founder of codeofaninja.com, a site that helps you build web applications with PHP and JavaScript. Need support? Comment below or contact [email protected]
I'm also passionate about technology and enjoy sharing my experience and learnings online. Connect with me on LinkedIn, Twitter, Facebook, and Instagram.